

In Spring Boot, handling client requests is a common task when building REST APIs. Developers often need to read the request body sent by the client to process data such as JSON or form inputs.
- Spring Boot provides annotations to easily access data sent in HTTP requests.
- The request body usually contains JSON or XML data sent by the client.
@RequestBody
@RequestBody is an annotation in Spring MVC used to bind the HTTP request body to a method parameter in a controller. It automatically converts incoming JSON data into a Java object.
- Maps JSON data from the request body to a Java object.
- Commonly used in POST and PUT requests to receive client data.
Syntax
@PostMapping("/users")
public String createUser(@RequestBody User user) {
    return "User received: " + user.getName();
}
@RequestBody: Annotation is used to get the request body in the incoming request.
Step-By-Step Implementation
Step 1: Create a Spring Boot Project
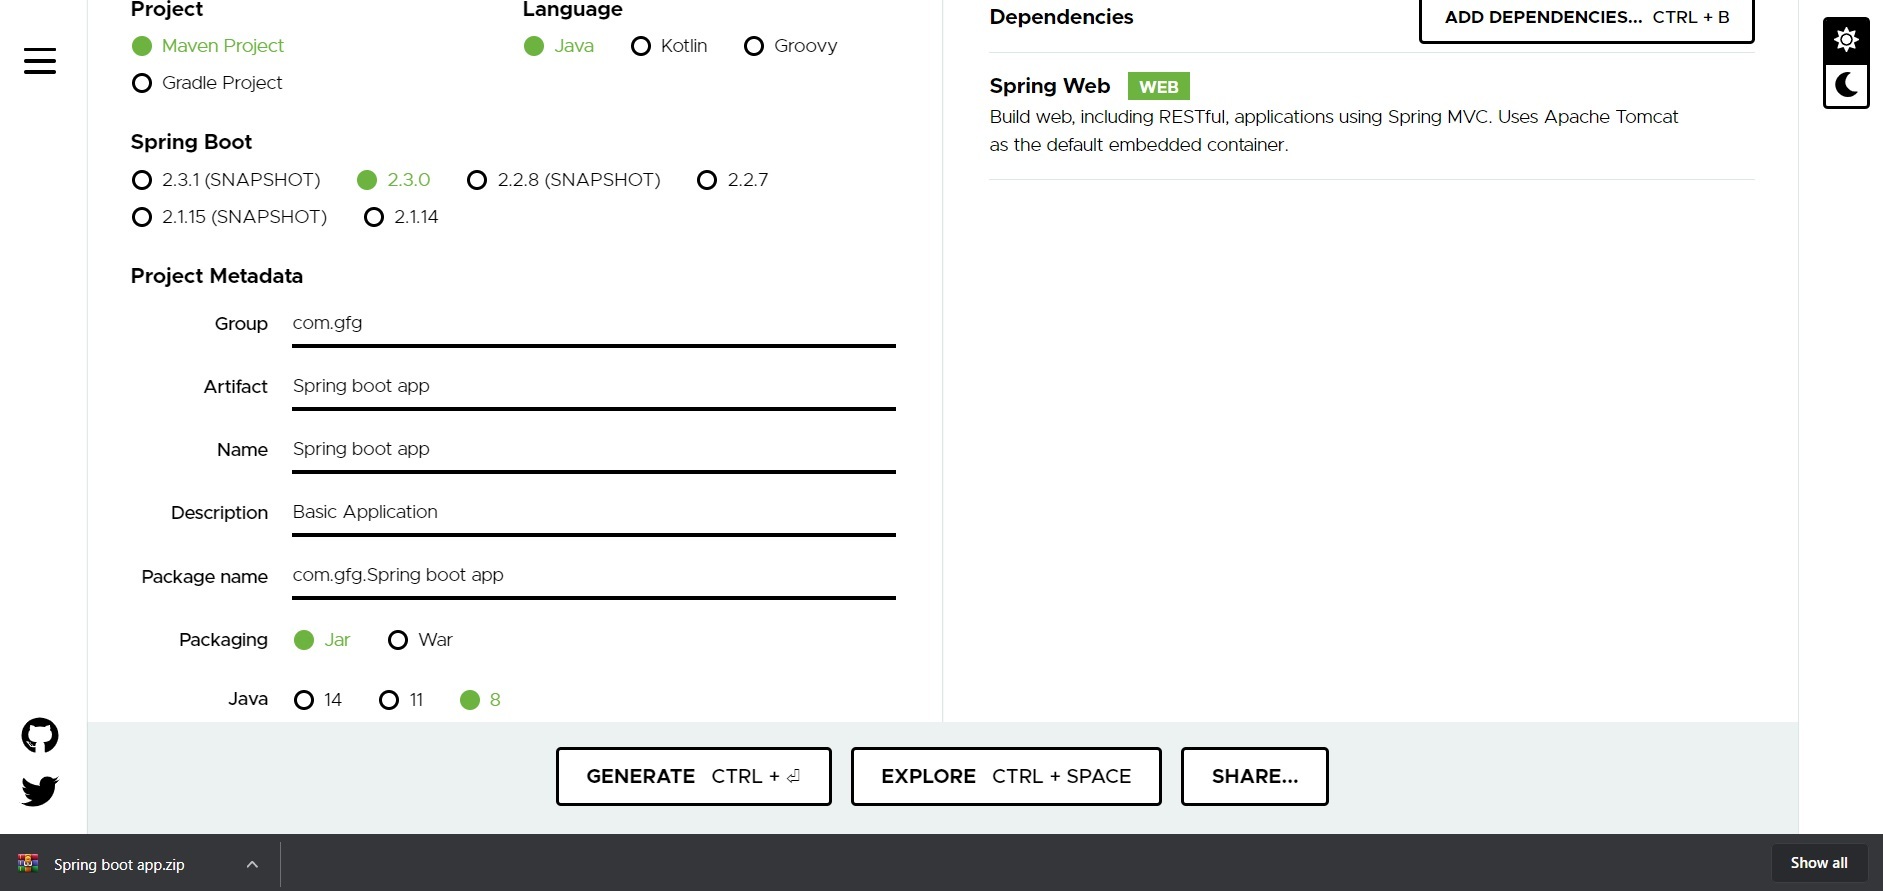
Generate a project using Spring Initializr and include the Spring Boot web dependency. Fill in the details as per the requirements. For this application:
- Project: Maven
- Language: Java
- Spring Boot: 2.2.8
- Packaging: JAR
- Java: 8
- Dependencies: Spring Web
Click on Generate which will download the starter project.
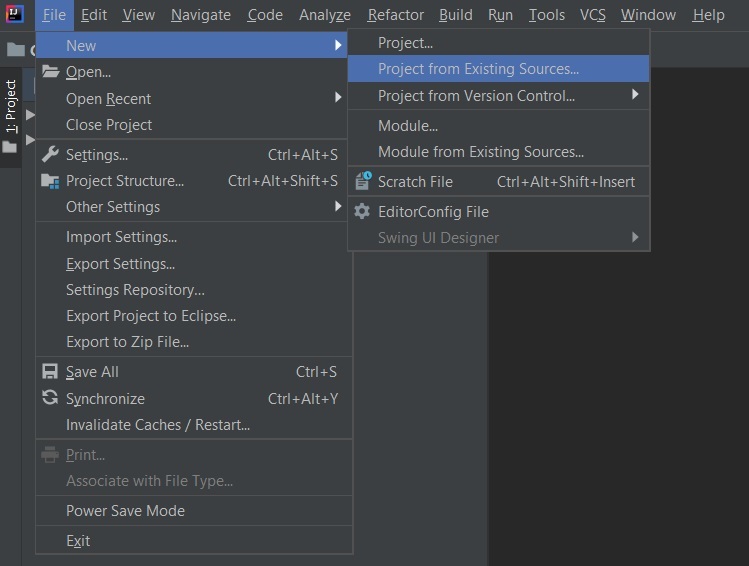
Extract the ZIP file and open your preferred IDE. Then navigate to File → New → Project from Existing Sources, select the Spring Boot project folder, and choose the pom.xml file. Import the project and wait for the dependencies to sync.
Note: In the Import Project for Maven window, make sure you choose the same version of JDK which you selected while creating the project.
Step 2 Create Entity Class
Create a class named Person inside -> src/main/java/com/example/demo.
Person.java
public class Person {

    private int id;
    private String name;
    private int age;

    // Default constructor (required)
    public Person() {}

    // Parameterized constructor
    public Person(int id, String name, int age) {
        this.id = id;
        this.name = name;
        this.age = age;
    }

    // Getters and Setters
    public int getId() { return id; }
    public void setId(int id) { this.id = id; }

    public String getName() { return name; }
    public void setName(String name) { this.name = name; }

    public int getAge() { return age; }
    public void setAge(int age) { this.age = age; }

    @Override
    public String toString() {
        return id + " " + name + " " + age;
    }
}
This class represents the data that will be received from the request body.
Step 3: Create Controller
Create a controller class and use the @RequestBody annotation to read the request body.
Controller.java
import org.springframework.web.bind.annotation.*;

@RestController
public class Controller {

    @PostMapping("/person")
    public String getBody(@RequestBody Person person) {
        // Process and return the received data
        return "Received: " + person.toString();
    }
}
Here, the Person object is automatically created by Spring using the JSON data received in the request body.
Step 4: Run main class
Run the main Spring Boot application class and wait for the embedded Tomcat server to start.
import org.springframework.boot.SpringApplication;
import org.springframework.boot.autoconfigure.SpringBootApplication;

@SpringBootApplication
public class MainApplication {

    public static void main(String[] args) {
        SpringApplication.run(MainApplication.class, args);
    }
}
By default, the application runs on:
http://localhost:8080
Note: The default port 8080 can be changed in the application.properties file.
Step 5: Send Request Using Postman
Open Postman and send a POST request to
http://localhost:8080/person
Request Body (JSON)
{
"id": 1,
"name": "Aayush",
"age": 32
}
Output:
The received data will be printed in the terminal/console:
1 Aayush 32
