Using a picture as a slide background can give your presentation a more polished and professional look, especially for title slides, section dividers, or closing slides.
Method 1: Add a Background Image to a Single Slide
Step 1: Select the slide you want to customize.
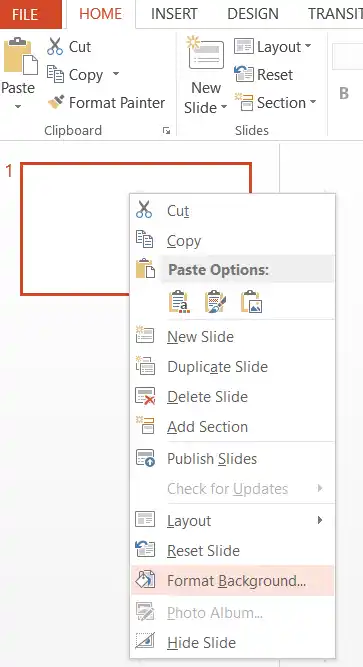
Step 2: Right click on an empty area of the slide (outside any text or image placeholders) and choose Format Background.
Alternatively: Go to the Design tab → Format Background.
Step 3: In the Format Background pane, select Picture or texture fill.
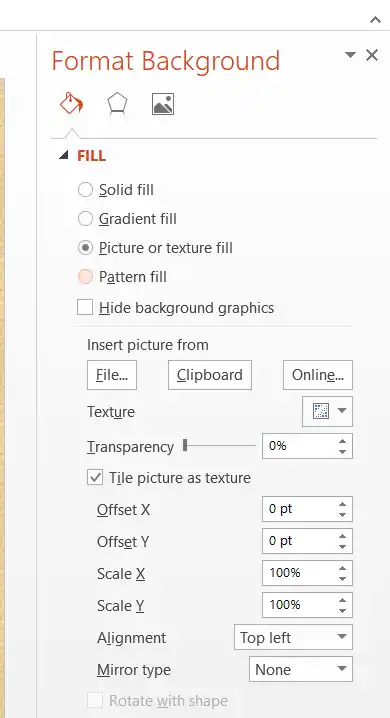
Step 4: Under Picture source, click Insert and choose one of the following options:
- From a File : Select an image from your computer or network.
- Stock Images : Choose from Microsoft’s high-quality royalty-free library.
- Online Pictures : Search the web (check copyright before using).
Step 5: The selected image will fill the entire slide as the background.

Step 6: Adjust the Transparency slider so that text and other content remain easy to read (usually between 30%–60%).

Step 7: Close the pane when finished.
Method 2: Apply the Same Background Image to All Slides
- Follow the steps above to add the background image to one slide.
- At the bottom of the Format Background pane, click Apply to All.
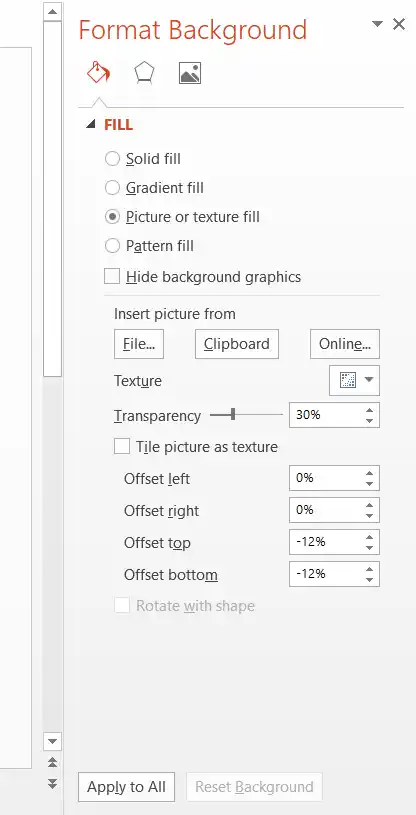
- This applies the same background image consistently across the entire presentation.

Method 3: Fine Tune the Background Image
While the Format Background pane is open, you can:
- Adjust Offset (Left, Right, Top, Bottom) to reposition or zoom the image.
- Enable Tile picture as texture if you want the image to repeat as a pattern.
- Switch between Picture fill and Texture fill as needed.