Microsoft PowerPoint makes it easy to create professional presentations, whether starting from a blank slide or using a pre-designed template. With intuitive tools for layouts, themes, text, visuals, transitions, and animations, you can tailor your slides for reports, pitches, classrooms, or webinars.
Step 1: Open Microsoft PowerPoint
To begin, launch Microsoft PowerPoint on your computer:
- Windows: Click the Start menu, search for “PowerPoint,” and select the Microsoft PowerPoint app.
- Mac: Open PowerPoint from the Applications folder or Launchpad.
- You can also use PowerPoint Online (via Microsoft 365) if the desktop app is not installed.
Step 2: Start a Blank Presentation or Choose a Template
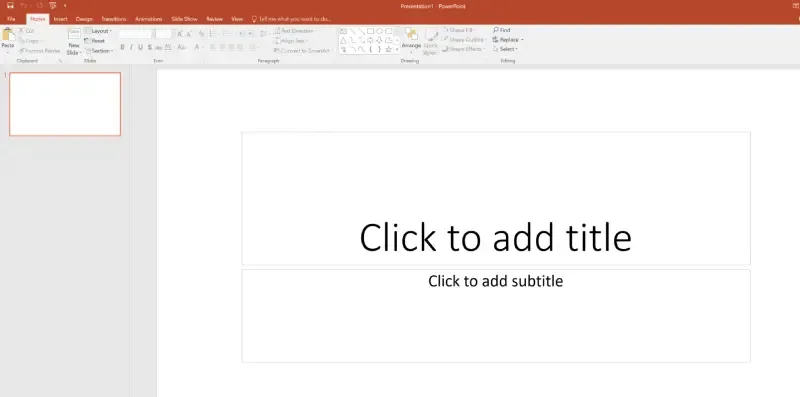
When you open PowerPoint, the Start screen offers options to create a new presentation:
- Select Blank Presentation to open a new, empty presentation with default settings.
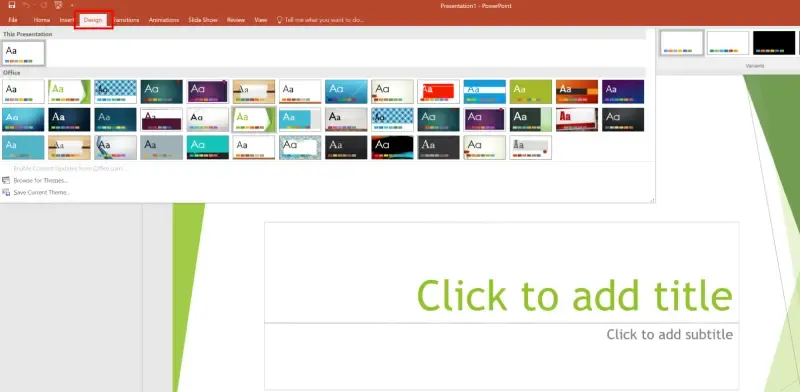
- Or choose a pre-designed template for a ready made professional look.
To use a template:
- On the Start screen or go to File > New.
- Browse available templates or search for specific ones (e.g., “business,” “education”).
- Click a template to preview it, then select Create.
Step 3: Add and Organize Slides
A presentation consists of multiple slides. Add and arrange them for a logical flow:
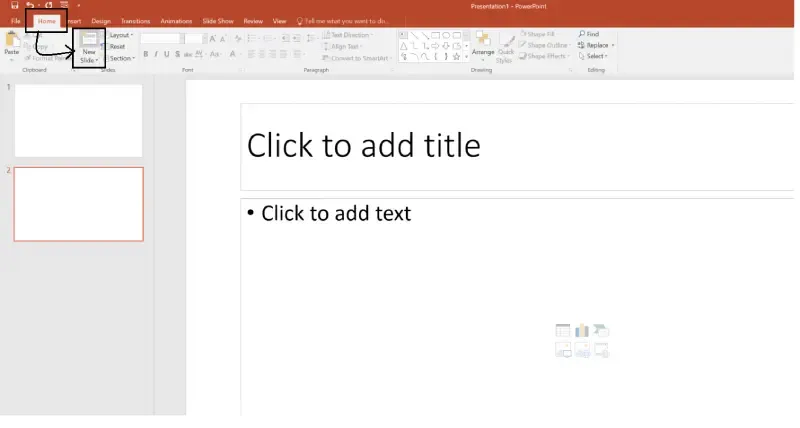
- Go to the Home tab and click New Slide (or press Ctrl + M).
- Choose a suitable layout (Title Slide, Title and Content, Two Content, Blank, etc.).
- Use Slide Sorter View (View tab or status bar) to rearrange slides by dragging thumbnails.
Step 4: Add and Format Text
Clear, concise text helps convey your message effectively:
- Click inside a text placeholder or insert a Text Box (Insert tab).
- Type your content. Use bullet points or numbered lists for readability.
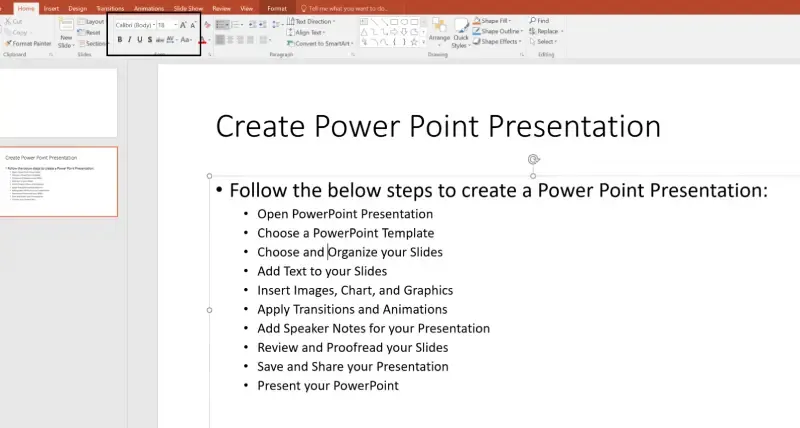
- On the Home tab, adjust font style, size, color, bold/italic, alignment, and spacing.
- Keep text short avoid long paragraphs.
Step 5: Insert Images, Charts, and Graphics
Visuals make presentations more engaging:
To add images:
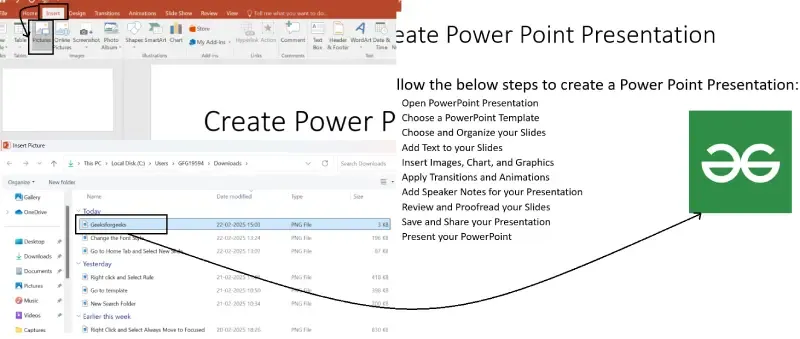
- Go to the Insert tab.
- Click Pictures → This Device (or Online Pictures / Stock Images).
- Select and insert the image, then resize or crop as needed.
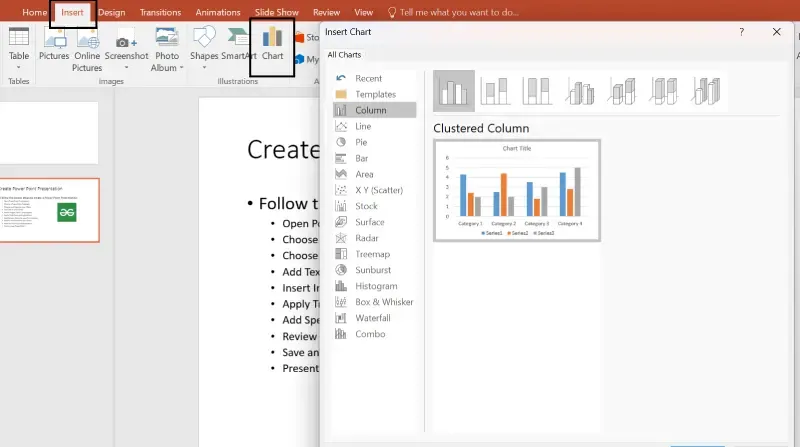
To add charts:
- Go to the Insert tab → Chart.
- Choose a chart type (Bar, Line, Pie, etc.).
- Enter or paste your data and customize the style.
Step 6: Apply Transitions and Animations
Transitions and animations add polish and movement (use them sparingly):
Slide Transitions:
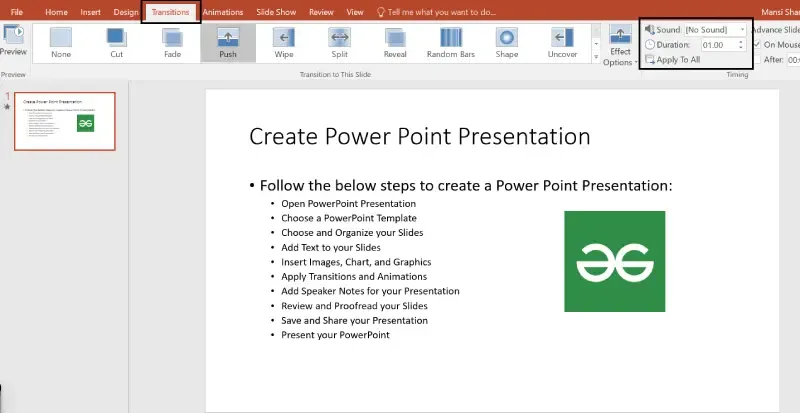
- Select a slide and go to the Transitions tab.
- Choose an effect (Fade, Push, Wipe, etc.).
- Adjust duration and apply to the current slide or all slides.
Object Animations:
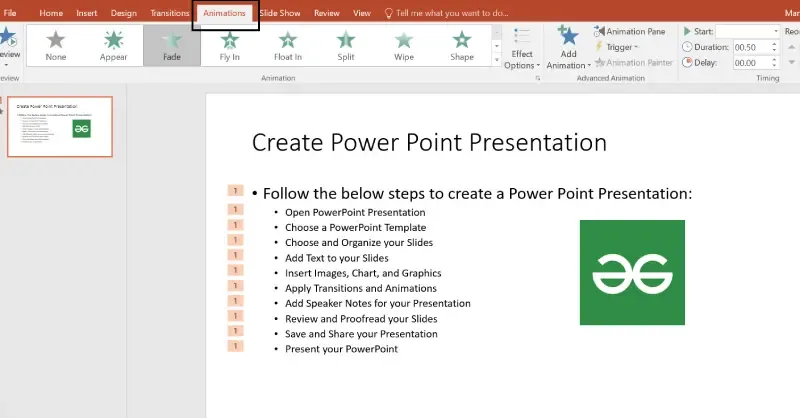
- Select an object (text, image, or chart).
- Go to the Animations tab.
- Choose an effect (Appear, Fly In, Zoom, etc.) and set timing/order via the Animation Pane.
Step 7: Add Speaker Notes
Speaker notes help you remember key points while presenting:
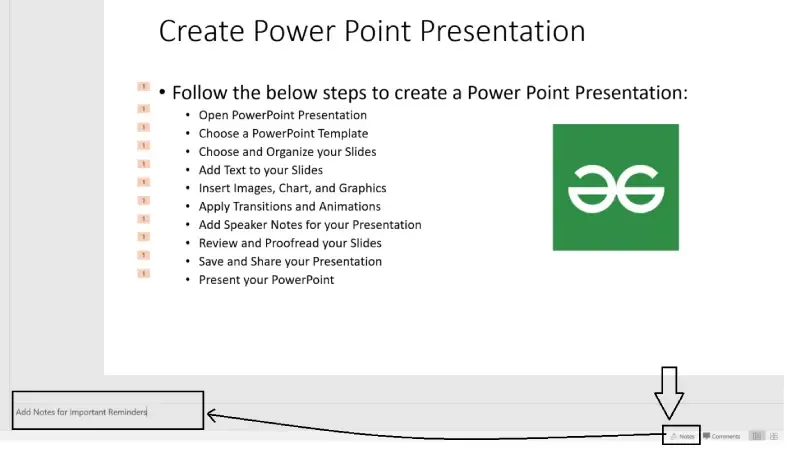
- Click the Notes section below the slide.
- Type brief talking points or reminders.
- During the presentation, use Presenter View to see notes privately while the audience sees only the slides.
Step 8: Review and Proofread Your Slides
Before finalizing, check for errors and consistency:
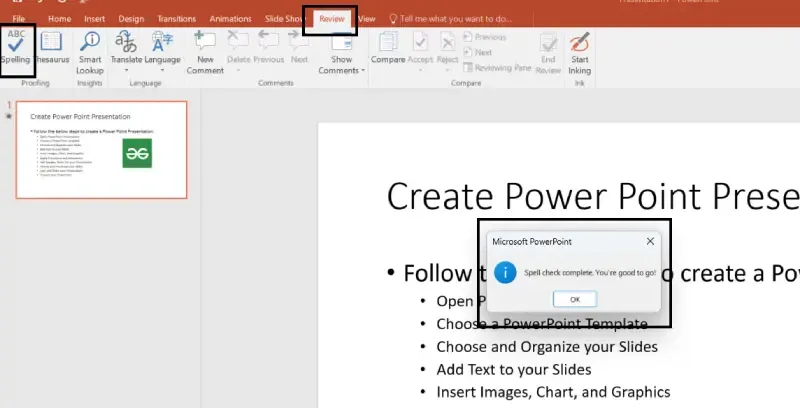
- Go to the Review tab → Spelling & Grammar.
- Switch to Slide Sorter View to review overall flow and order.
- Check for consistent fonts, colors, alignment, and spacing.
Step 9: Save and Share Your Presentation
To save:
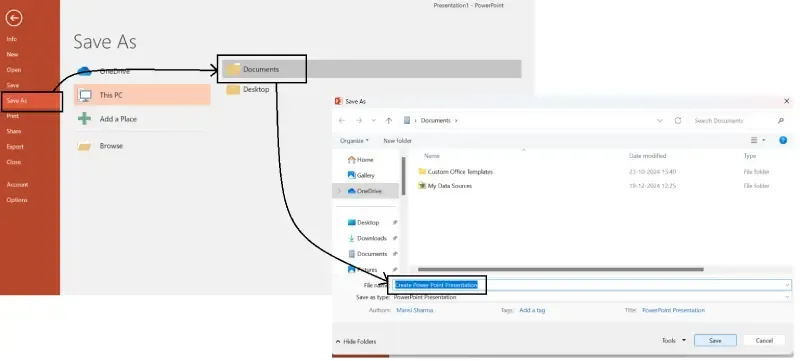
- Go to File > Save As (or press Ctrl + S).
- Choose PowerPoint Presentation (.pptx) for editable files, or PDF for a fixed version.
- Save locally or to OneDrive for cloud access.
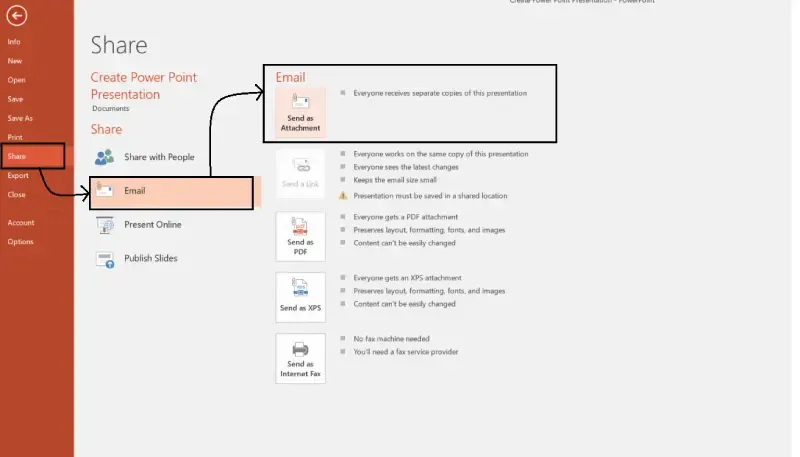
To share:
- Attach the file in email.
- Share via OneDrive or Microsoft Teams.
- Export as a video if needed.
Step 10: Present Your PowerPoint Like a Pro
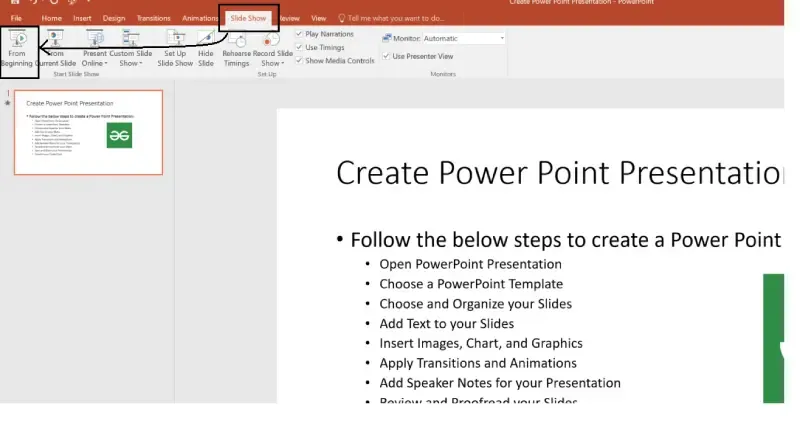
- Go to the Slide Show tab → From Beginning (or press F5).
- Use Presenter View for notes and timing.
- Navigate with arrow keys, mouse, or a clicker.