Well it's Monday, I am off for the 4th and still sick. I have been coughing for days--got some good meds but this cough is killing me. I have to admit I did not get as much scraping done as I wanted part due to being sick--and the other part I am going to blame Prove Craft as there is still NO GYPSY update for the Cricut Lites--really. I am not going to vent but it is highly annoying I have 7 of them! I am hoping the update will be up and going this week.
On to the Calendar--
I used Cindy Loo for the word 'July', going places for the city scape, and Independence Day for Lady Liberty
I sent the letters through the Xyron and added some silver glitter. I also used one of my favorite finds of all time--Stamp-N-Foil. I think it really makes the fire works sparkle over the NYC skyline.
I do hope you all had a great weekend and a wonderful 4th of July!
Showing posts with label Calendar. Show all posts
Monday, July 5, 2010
Monday, June 14, 2010
June Calendar using Cricut Life's A Beach
Happy Monday to you all! Today I have the June Calender to share with you all--with the start of summer and every one's love of a good beach--I thought this creation was perfect.
I love adding layers and depth to a layout--I did it here by placing the sea weed and coral in between the sand strips. When doing this, if you leave some parts unglued it gives it more of a natural feel and allows you to add other things like the seahorses and coral in and among the sea weed and sand.
I added a couple of pop-dots to the crab so you could see his smile. Glitter is one of my favorite things to use--here I used it on two of the lime green sea weeds and a few of the corals.
Here it is all put together.
I have already started July's and it is explosive! (pardon the pun) Have a great day and we will see you soon!
I love adding layers and depth to a layout--I did it here by placing the sea weed and coral in between the sand strips. When doing this, if you leave some parts unglued it gives it more of a natural feel and allows you to add other things like the seahorses and coral in and among the sea weed and sand.
I added a couple of pop-dots to the crab so you could see his smile. Glitter is one of my favorite things to use--here I used it on two of the lime green sea weeds and a few of the corals.
Here it is all put together.
I have already started July's and it is explosive! (pardon the pun) Have a great day and we will see you soon!
Labels:
Calendar,
Life's A Beach
Saturday, May 1, 2010
May Calendar.....using Cricut Serenade, Cricut Songbird
Happy National Scrapbooking Day! As I do on the first post of every month--I have a calendar idea to share. May is a wonderful month in Texas--weather is usually not to hot or wet and it is the last month you can walk to your car wiht out breaking a sweat. I wanted to make a layout that was bright and still had a little rustic thrown in. Here is the results-
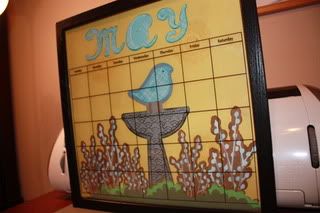
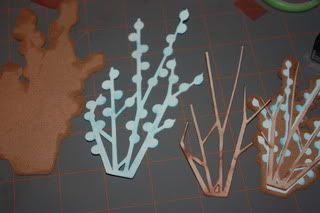
I started with the wild flowers using kraft paper for the shadow and solid card stock for the layers--inked the edges for a rustic feel and layered them up
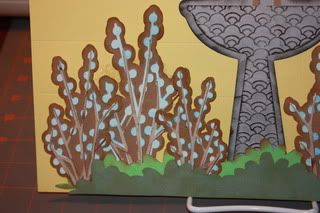
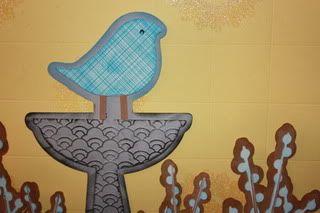
I added a birdbath from Cricut Songbird and did some creative layering and inking to give it more of a pop!

I had to add some cuttlebuging to the project!
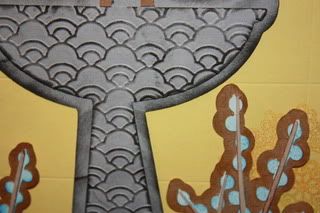
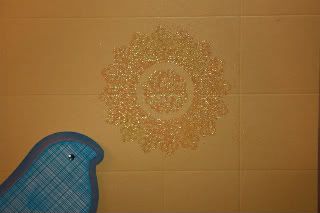
Lastly, I used a stamp from SEI and VersaMark ink to creat a background that I heat embossed with clear powder--I think it gives is a sunshine feel!
Don't forget to leave a comment as today is the last day to enter to win the jukebox! Before the day is out--be sure to stop in over at Everyday Cricut and check out the really cool project that Wendy made as well as the a really awesome give away that they Joy and Mel will post detials of later today!
I have a really fun week planned starting Sunday--everyday there will be a post and who knows....some very cool blog candy! Check back on Sunday to get the low down!
Have a great Saturday-
Bryan

I started with the wild flowers using kraft paper for the shadow and solid card stock for the layers--inked the edges for a rustic feel and layered them up


I added a birdbath from Cricut Songbird and did some creative layering and inking to give it more of a pop!

I had to add some cuttlebuging to the project!


Lastly, I used a stamp from SEI and VersaMark ink to creat a background that I heat embossed with clear powder--I think it gives is a sunshine feel!

Don't forget to leave a comment as today is the last day to enter to win the jukebox! Before the day is out--be sure to stop in over at Everyday Cricut and check out the really cool project that Wendy made as well as the a really awesome give away that they Joy and Mel will post detials of later today!
I have a really fun week planned starting Sunday--everyday there will be a post and who knows....some very cool blog candy! Check back on Sunday to get the low down!
Have a great Saturday-
Bryan
Labels:
Calendar,
Cricut Serenade,
Cricut Songbird,
Cuttlebug
Friday, April 2, 2010
April Calendar using Cricut Easter and Cricut Designer Calendar
It’s Good Friday and I hope your Easter weekend will be filled with Family and Friends. If you have been following my blog for the past couple of months, you know I do a calendar as my first post of each month. This month I wanted to show that when you detail you die cuts it makes the world of difference.

I used chalk inks, glimmer mist, fine tip markers, and a couple of felt butterflies. I am a firm believer of a heavy hand in inking—I love the highs and lows you get. I layered two colors of green for the grass and placed the rabbit behind and used a brand for the rabbit’s eye. I cut the Easter egg with two colors. For the yellow layer I also used yellow glimmer mist to give it a little shimmer!
Come back next week to see the projects I made with and Asian Flair—since I am overseas I thought this was a great opportunity to showcase Cricut Pagoda and the Asian Cuttlebug Bundle.
Hope you have a Happy Easter!
Bryan

I used chalk inks, glimmer mist, fine tip markers, and a couple of felt butterflies. I am a firm believer of a heavy hand in inking—I love the highs and lows you get. I layered two colors of green for the grass and placed the rabbit behind and used a brand for the rabbit’s eye. I cut the Easter egg with two colors. For the yellow layer I also used yellow glimmer mist to give it a little shimmer!
Come back next week to see the projects I made with and Asian Flair—since I am overseas I thought this was a great opportunity to showcase Cricut Pagoda and the Asian Cuttlebug Bundle.
Hope you have a Happy Easter!
Bryan
Labels:
Calendar,
Cricut Designers Calendar,
Cricut Easter
Subscribe to:
Posts (Atom)