Today, my intrepid reader, I hope to offer you some tips on using Microsoft Excel for designing colorwork. This will be a long and picture heavy post, so I hope you'll bear with me. Later, I will do a tutorial on designing stitch pattern charts
in Excel. I am currently using Excel X for the Mac. I will do my best to provide instructions that can be used cross-platform and with older versions of the software, but your results may still vary. I've enlarged the cursors throughout, to make the actions more obvious and most of the images can be enlarged by clicking on them. Still, if you hit a snag, just drop me a comment or email and I'll try to help you out.
Many moons ago I bought a cute fair isle sweater. It was inexpensive but very cute, fit well was exceedingly warm. Unfortunately, she found her way into the wash and was never the same.
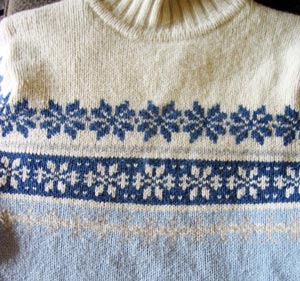
Sweater I bought and subsequently sent through the wash
Having escaped the drier, the sweater still fits but the fair isle portion pulls in and causes a weird a-line shape to the piece that is no longer flattering. I've been thinking I would like to reknit it, someday, using the same pattern, but perhaps some different colors. Excel can be a fun way to play with this idea.
Excel is not going to easily give you an exact row and stitch gauge chart. I'm sure there's a way, but the measurements in excel are based on the point size of the font in use. Honestly, though, this should not pose a huge problem. You will be using Excel primarily as a charting tool for either publication of the pattern and/or for experimentation with color choices and designs. The only time you may get yourself into trouble is if you attempting to reproduce a very complex pattern that will be adversely effected by slight variations in proportion. Working a likeness of a person, may be one example. In that case, I would suggestion you download some actual size graph paper, and work out the pattern there first, then reproduce it in Excel, if you plan to make the pattern available to others.
Create a new file.
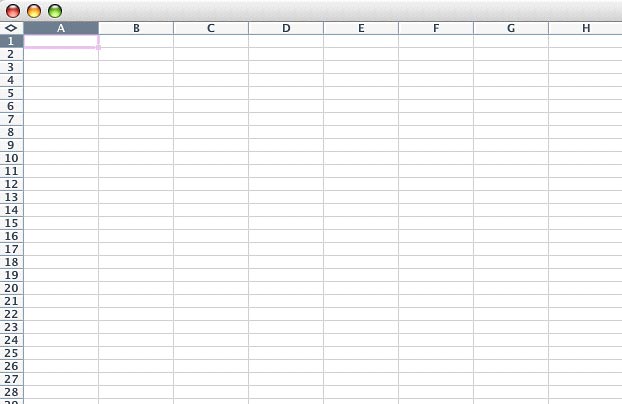
Click the diamond in the upper left hand corner to select all rows and columns.
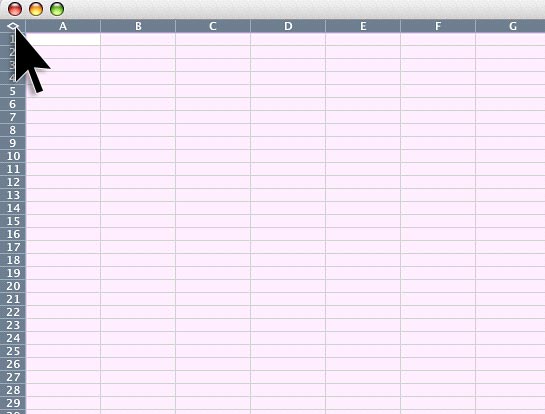
Adjust the size of the columns and rows to have a stitch like proportion (slightly wider than tall). Your cursor will change to look like a plus sign with two arrows, when you place it between any two columns or rows. Click and drag when your cursors look like smaller versions of the image below.
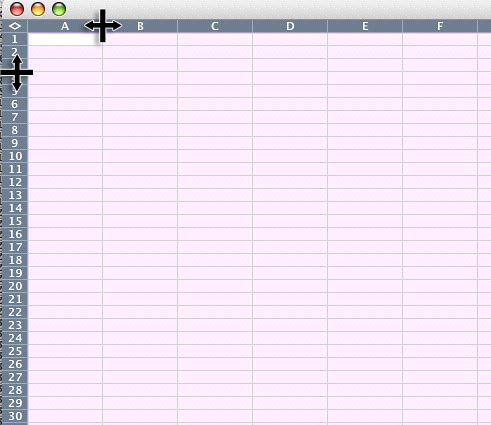
Your cells should now look a little like the image below. Again, it's not important that it be exact, but you want to get a similar scale to your gauge.
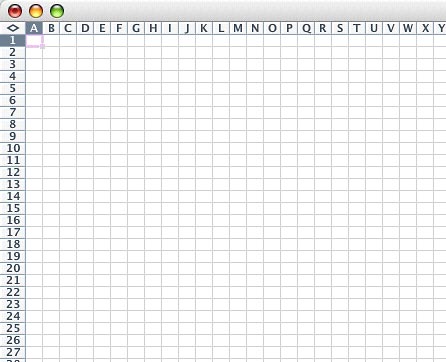
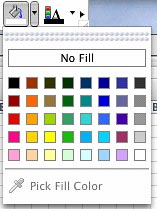
Now, make sure your fill button is available in your toolbar. It should look like a little bucket and when you click it, you should see 40 preset color swatches. If you cannot see this button, go to your VIEW menu, to TOOLBARS and choose FORMATTING. If the colors you need are all here (or reasonably close options) you are ready to begin designing, if not, you can change these presets, along with some additional swatches, by doing the following.
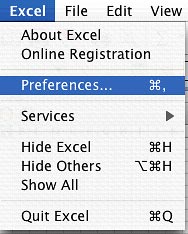
Go to your Excel preferences. On a Mac, this should be located in your EXCEL (OSX) or EDIT (OS9) menu. On a PC, this should be located in your TOOLS menu and be called OPTIONS. If you are using Linux, don't ask, because I have no idea, but if you are that nerdy, you should be able to figure it out yourself. ;o)
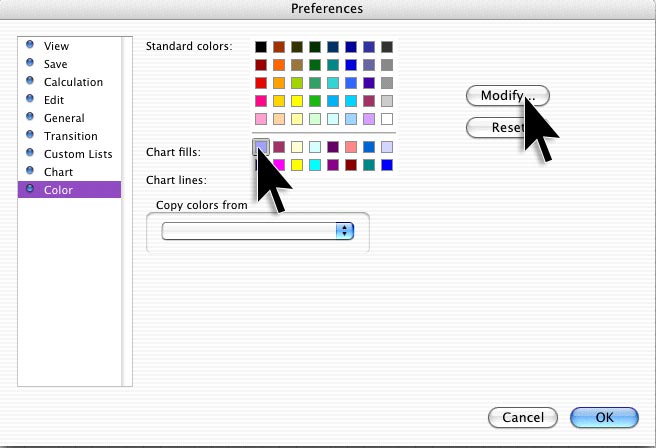
Navigate to your COLOR preferences. You may now modify any of the original 40 swatches as well as 16 additional swatches at the bottom. These additional swatches are accessed by going to the FORMAT menu and choosing CELL.
Click any swatch and choose MODIFY.
Please note, if you change the 40 default swatches on top, the colors may not "stick" when someone else opens the file on a different machine. If you plan to share this document, make your custom colors with the 16 lower swatches.
When you click MODIFY, a new dialog box will open up that will allow you to choose new colors. I am not sure how this works on a PC, but on the Mac, there are several different options, (the icons at the top of the box,) for choosing new colors. Find the one that is most logical to you. You can save your favorite colors to the row of swatches along the bottom. You can also click the magnifying glass to sample colors anywhere on your monitor. When you find your favorite color, just click OK.
Your monitor can never display the exact color you will knit with, so use this as a guide and make sure you check the actual yarn in sunlight, to make sure the colors work together.
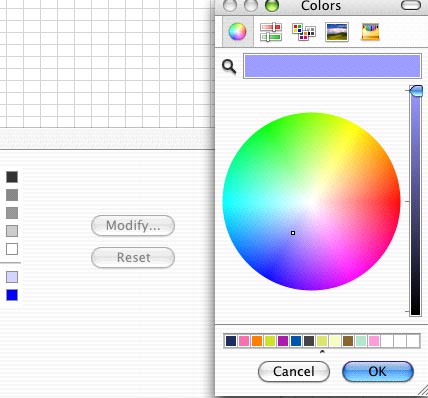
Consider using the magnifying glass to sample all the colors from a webpage showing samples of your color choices.
Now you are ready to start creating. Select an area and set your background color. Don't worry about making it exactly one motif wide and tall. You'll clean that up later.
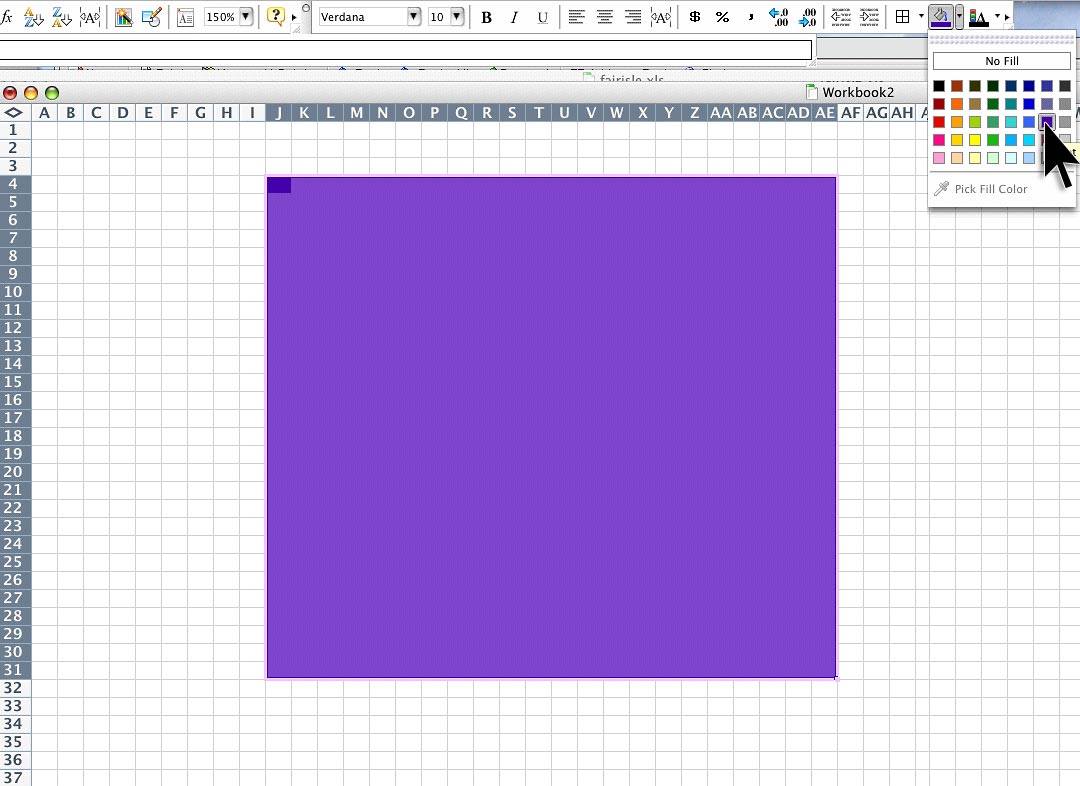
Now start drawing your motif with your primary motif color. In this case,
we are making a blue background with a white motif and a green accent color.
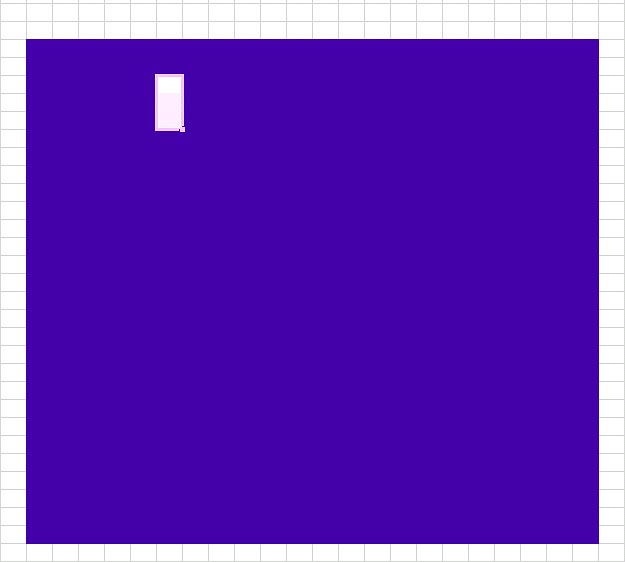
Excel allows you to repeat your last action. If you just applied a white color to some blocks, you can do it to another set of blocks without having to go back up to the color palette. Simply click CMND+Y for a Mac or CTRL+Y for a PC.
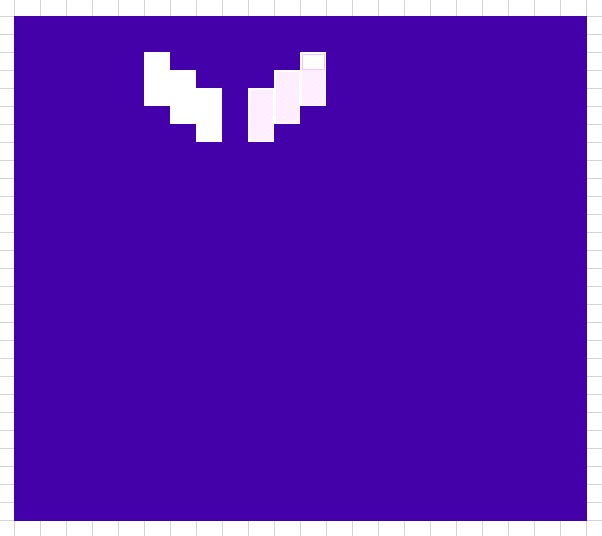
The motif looks just about right except that it's sitting rather unceremoniously off-center in its field of blue. It's now time to clean that up.
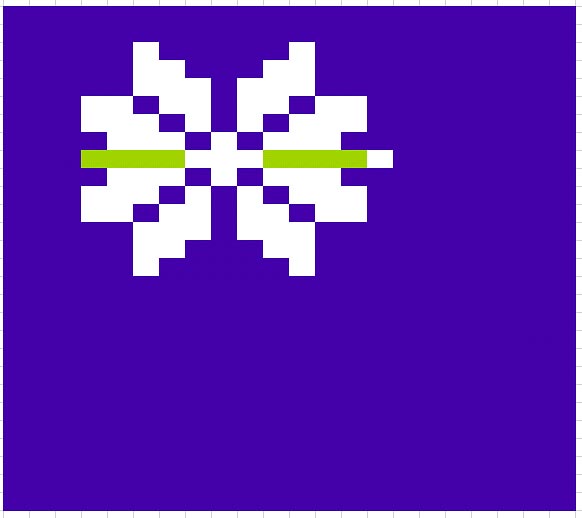
Select the cells you wish to clear, (I usually do this one side at a time), and click the fill bucket again. Choose NO FILL.
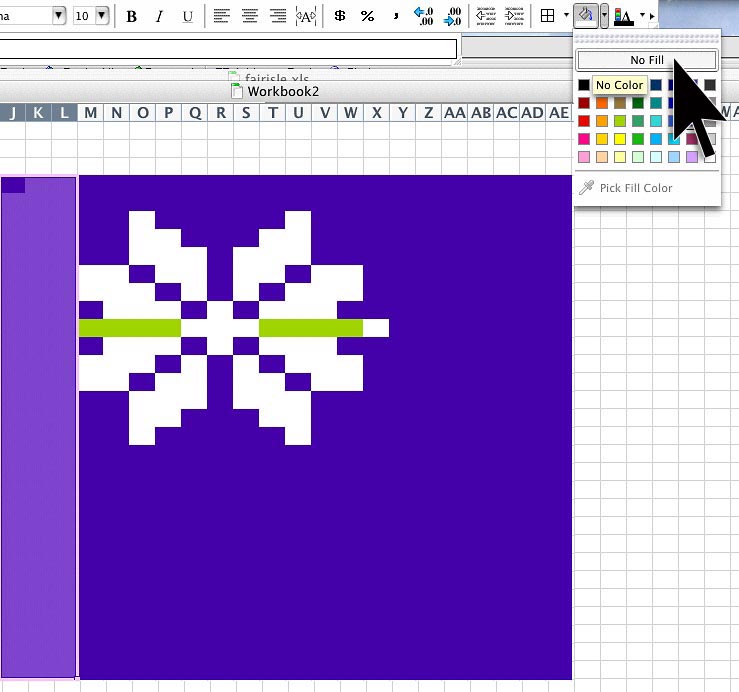
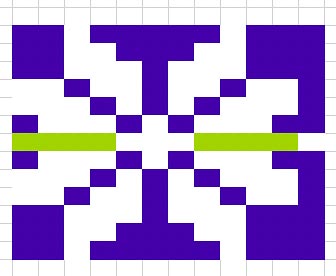
Once you've cleared all the unwanted cells, your motif is complete.
Copy and paste it and make variations to see how they'll look.
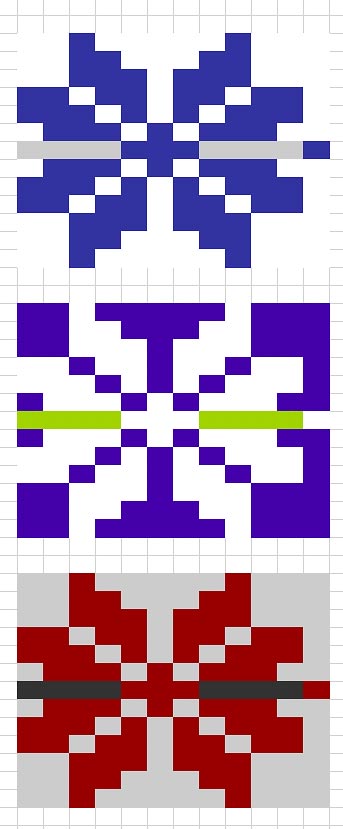
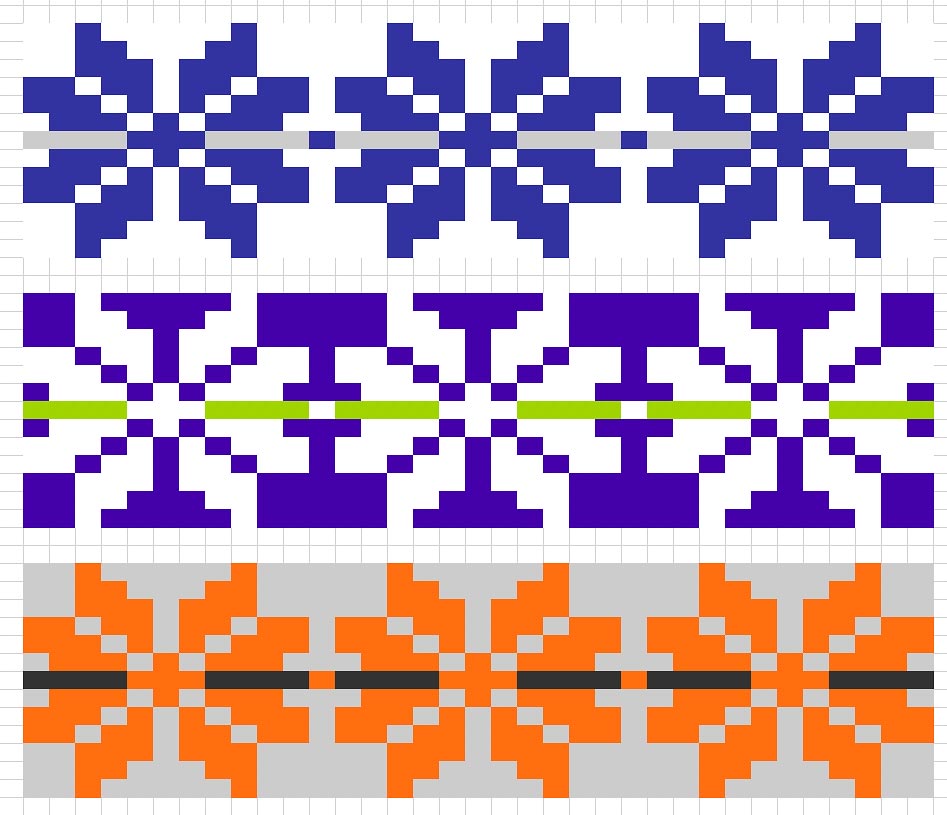
Once a color is applied, it remains linked to it's swatch in the fill palette. You can change all the occurrences of a single color by going back to your color preferences. For instance, if you wanted to see how your swatch would look with orange instead of red, you could change your red swatch in the Excel Preferences.
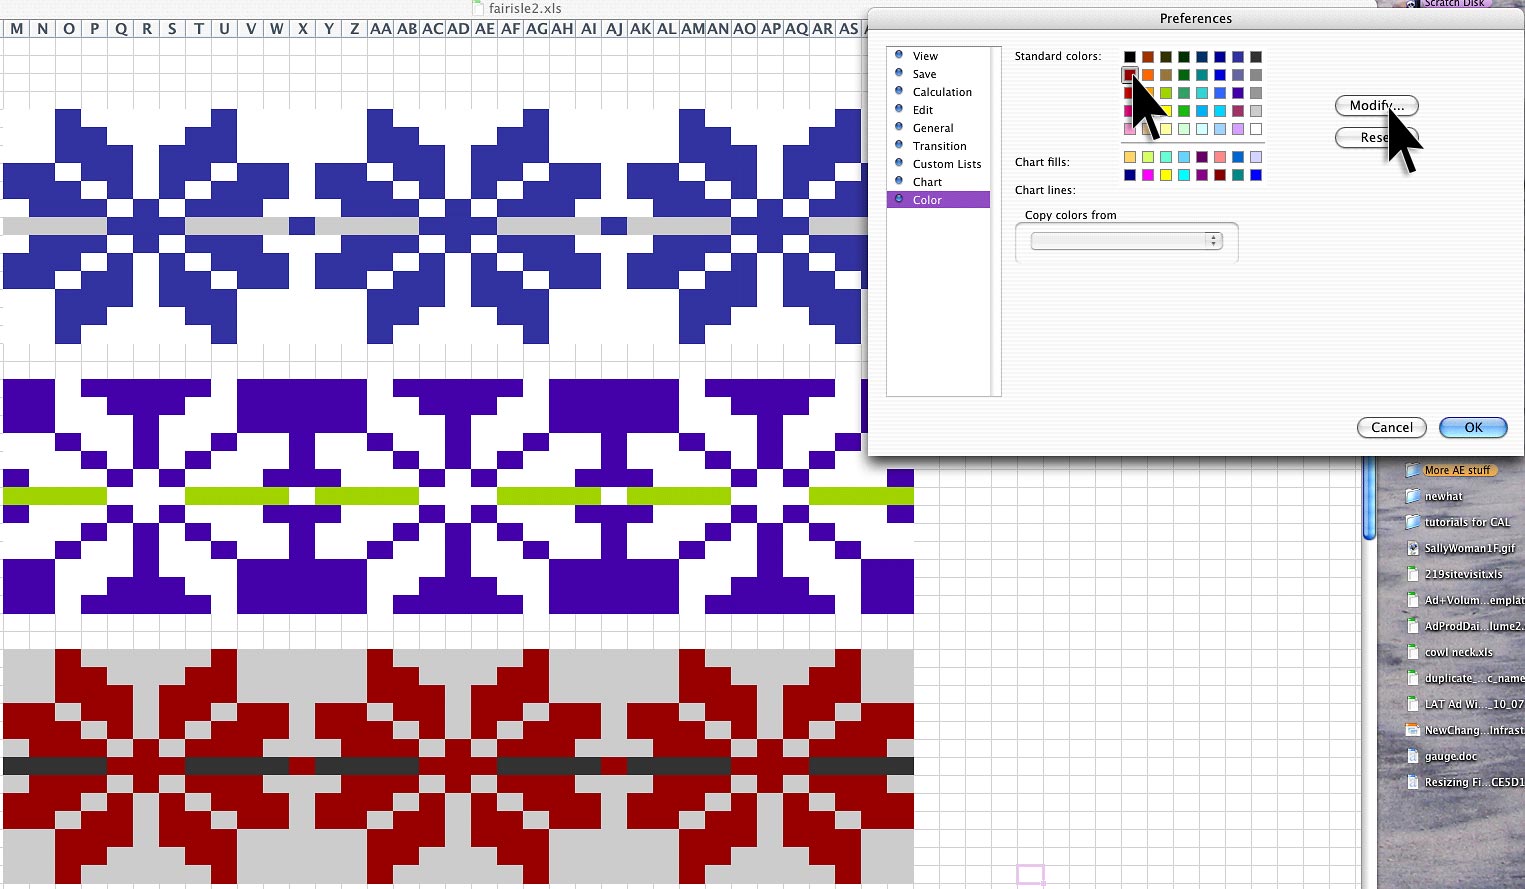
Just pick your new color and then click OK.
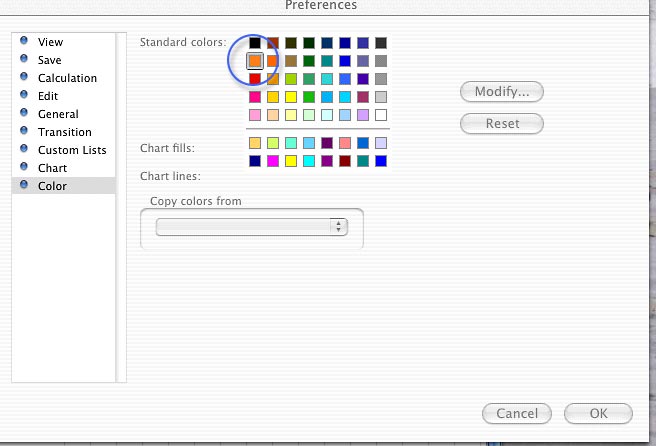
The color will update automatically, without any additional work on your part.
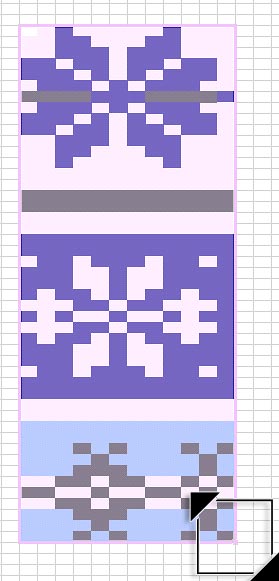
Below is a reproduction of the fair isle pattern on the semi-felted sweater from the start of the post. All the repeats are the same width, and use a limited palette of blues and grays.
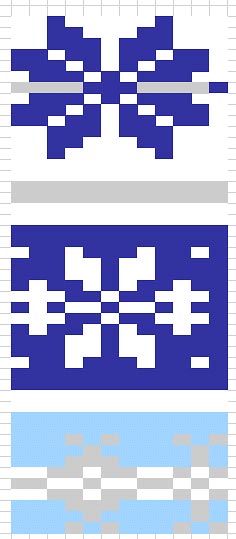
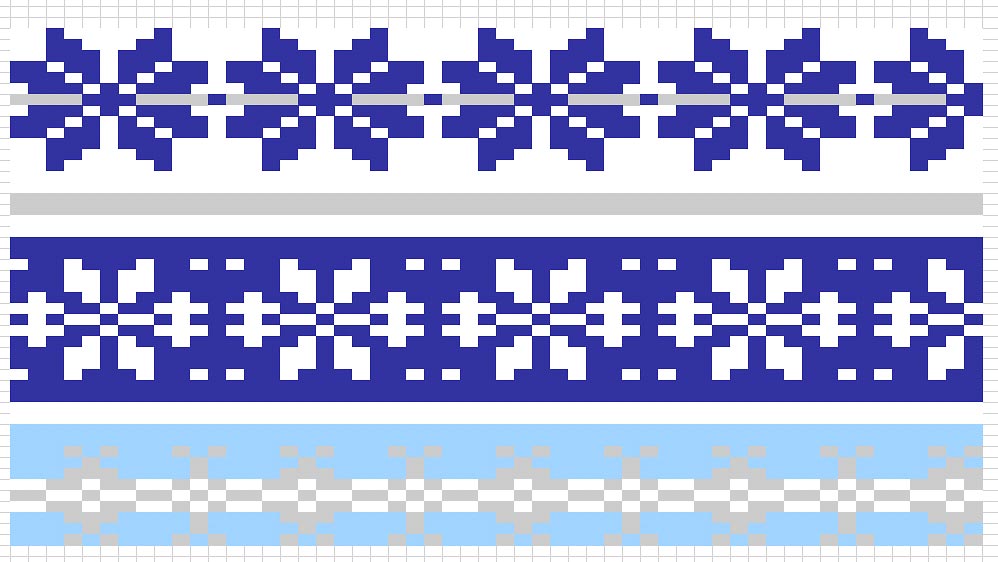
To repeat the pattern, select all the cells you wish to repeat. Be careful that you don't select any partial repeats. Excel will simply duplicate EXACTLY what you select. Move your cursor to the lower right hand corner, until the cursor changes to a box with two arrows. This tells you that you can now repeat the selection. Click and drag the cursor as wide as you'd like the repeat to be.
This is a great way to see how the pattern really works. Try zooming out so that you can really take the effect in as a whole.
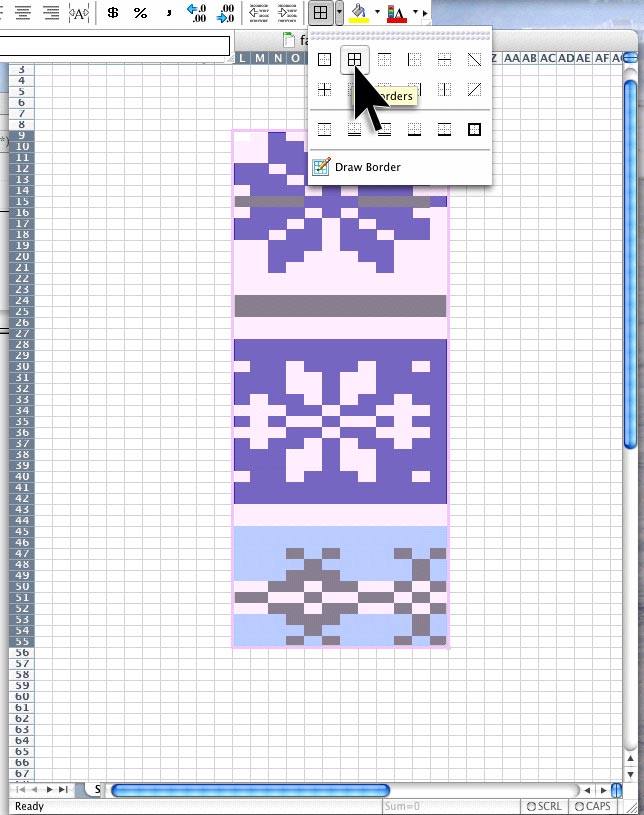
For design purposes, I generally don't put borders around all the stitches. There are no borders on real stitches and adding one in Excel makes it harder to see how the final piece will look. However, if you plan to use this for pattern publishing purposes, your audience is going to appreciate having borders so they can count stitches. Applying a border is quite simple. Just select all the stitches in your chart and click the Border button. Choose the ALL BORDERS option.
Add your row counts if necessary and your chart is ready for prime time. I generally save mine as PDFs, but you'll need additional software for that. In a pinch, take a screen capture and edit it in your editing software. This isn't good for print, but it's fine for web.
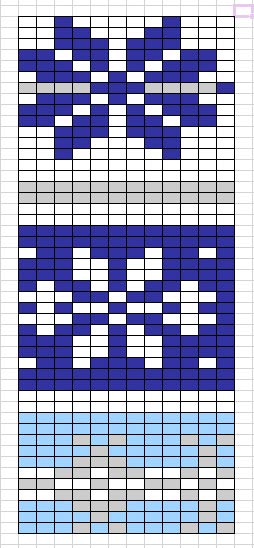
So now that I've plotted out the pattern for my poor little sweater, I can use this chart to re-engineer it. Now instead of an itchy wool, I can knit it up in merino. Can anyone say waist shaping? Since it's saved, I can always go back and change the colors. Maybe I'll knit it in shades of brown and cream, or maybe shades of green. The possibilities are endless. I hope this inspires you to do something fun with color too.


![[calpremiere.jpg]](https://blogger.googleusercontent.com/img/b/R29vZ2xl/AVvXsEiy0wh_95AcwniXEoBtZoHC2yUGJ2XuU8O_-D10FxvaeOSiaAAZM1J1JUHI-8zfGrMG6XFuO6WtsDA4bnq_jySFC87TnR_W_sP1M8F3Qm7KH-Rd4DMFp-C4FxTnvsq5uT1cptxd-XgQHng/s1600/calpremiere.jpg)
![[calpremieremove.gif]](https://blogger.googleusercontent.com/img/b/R29vZ2xl/AVvXsEjp5NGvZgOE3ghqG0Ksh0c6lFPEO_0hIHk4O2P5pWZ0wWdFS4L7lVQCH-6GkDPyynDaflFO1bc7V2YGCat9AKdSoPMgef2GrBPfe_b6l-llR-Ls7M-2KzYlwBBU_ehpWtIBFM6cdbKlA84/s1600/calpremieremove.gif)
