Apache Kafka is a distributed event streaming platform used for building real-time data pipelines and asynchronous communication systems. In a microservices architecture, Kafka enables services to communicate through events instead of direct API calls, resulting in better scalability, loose coupling, and fault tolerance.
- Enables asynchronous communication between microservices.
- Provides high throughput and fault-tolerant message processing.
- Supports event-driven architecture and real-time data streaming.
Why Use Apache Kafka in Microservices?
In a microservices architecture, services frequently communicate to exchange data and execute business workflows. Traditional synchronous communication using REST APIs can create tight coupling and reduce system scalability.
Apache Kafka solves these challenges by providing an asynchronous messaging platform that allows services to publish and consume events independently.
Benefits of Kafka-based Communication
- Loose Coupling: Services operate independently without direct dependencies.
- Scalability: Producers and consumers can scale separately.
- Fault Tolerance: Messages remain available even if a service temporarily fails.
- High Throughput: Kafka efficiently processes millions of messages.
- Real-Time Processing: Events are processed as they occur.
Apache Kafka Architecture in Microservices
Apache Kafka follows a distributed publish-subscribe architecture where microservices communicate asynchronously through topics instead of calling each other directly. Producers publish messages to Kafka topics, and consumers subscribe to those topics to process the messages independently. This architecture helps achieve loose coupling, scalability, fault tolerance, and high-throughput communication between microservices.
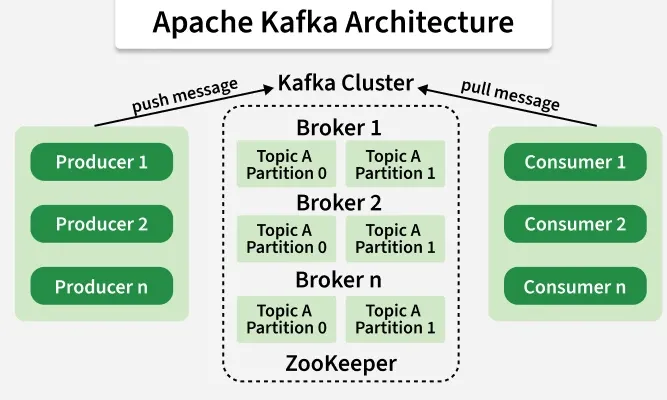
- Producer: A producer is responsible for publishing messages or events to Kafka topics whenever a business event occurs.
- Topic: A topic is a logical channel or category where messages are stored and organized inside Kafka.
- Partition: A partition is a subdivision of a topic that allows Kafka to distribute messages across multiple servers and process them in parallel.
- Broker: A broker is a Kafka server responsible for storing, managing, and delivering messages to consumers.
- Consumer: A consumer subscribes to Kafka topics and processes messages asynchronously.
- Consumer Group: A consumer group is a collection of consumers that work together to consume messages from a topic efficiently.
- ZooKeeper (Traditional Kafka Architecture): ZooKeeper manages cluster metadata, broker coordination, and leader election in traditional Kafka deployments.
Implementation of Microservices Communication with Apache Kafka in Spring Boot
Follow these steps to Implements a Microservices Communication with Apache Kafka:
Step 1: Install and Start Apache Kafka
Please make sure Kafka is installed and running on your local system as a Kafka server application.”
Step 2: Create the Spring Boot Project
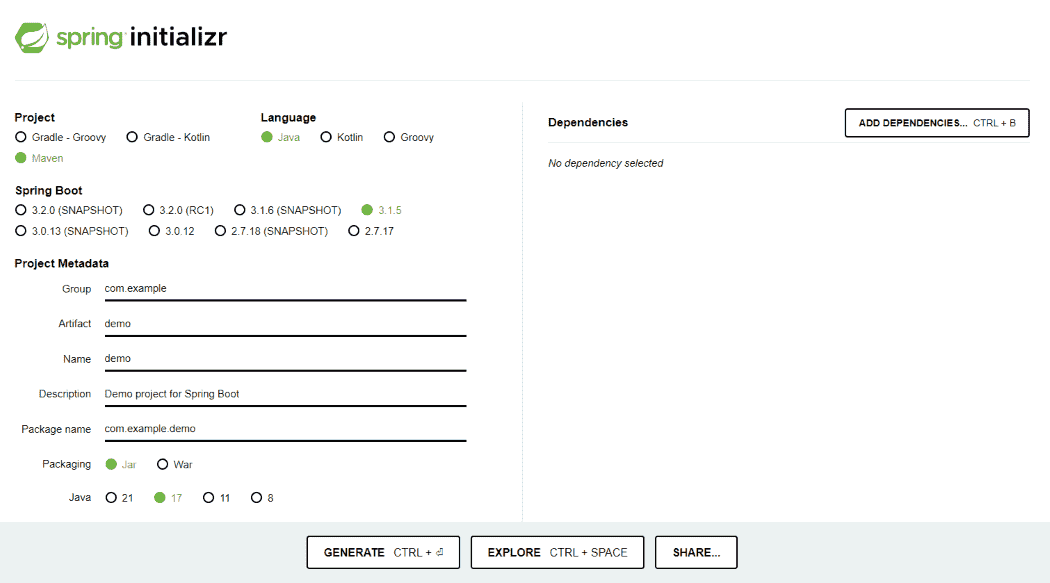
Create a Spring Boot project using the Spring Initializr and add the required dependencies.
- Spring Web
- Spring For Apache Kafka
- Lombok
- Spring DevTools
Step 3: Review the Generated pom.xml File.
The generated pom.xml file should contain the Following Dependency.
<?xml version="1.0" encoding="UTF-8"?>
<project xmlns="https://maven.apache.org/POM/4.0.0" xmlns:xsi="https://www.w3.org/2001/XMLSchema-instance"
         xsi:schemaLocation="https://maven.apache.org/POM/4.0.0 https://maven.apache.org/xsd/maven-4.0.0.xsd">
    <modelVersion>4.0.0</modelVersion>
    <parent>
        <groupId>org.springframework.boot</groupId>
        <artifactId>spring-boot-starter-parent</artifactId>
        <version>3.2.5</version>
        <relativePath/> <!-- lookup parent from repository -->
    </parent>
    <groupId>org.example</groupId>
    <artifactId>kafka-subscribe</artifactId>
    <version>0.0.1-SNAPSHOT</version>
    <name>kafka-subscribe</name>
    <description>kafka-subscribe</description>
    <properties>
        <java.version>17</java.version>
    </properties>
    <dependencies>
        <dependency>
            <groupId>org.springframework.boot</groupId>
            <artifactId>spring-boot-starter-web</artifactId>
        </dependency>
        <dependency>
            <groupId>org.springframework.kafka</groupId>
            <artifactId>spring-kafka</artifactId>
        </dependency>

        <dependency>
            <groupId>org.springframework.boot</groupId>
            <artifactId>spring-boot-devtools</artifactId>
            <scope>runtime</scope>
            <optional>true</optional>
        </dependency>
        <dependency>
            <groupId>org.projectlombok</groupId>
            <artifactId>lombok</artifactId>
            <optional>true</optional>
        </dependency>
        <dependency>
            <groupId>org.springframework.boot</groupId>
            <artifactId>spring-boot-starter-test</artifactId>
            <scope>test</scope>
        </dependency>
        <dependency>
            <groupId>org.springframework.kafka</groupId>
            <artifactId>spring-kafka-test</artifactId>
            <scope>test</scope>
        </dependency>
    </dependencies>

    <build>
        <plugins>
            <plugin>
                <groupId>org.springframework.boot</groupId>
                <artifactId>spring-boot-maven-plugin</artifactId>
                <configuration>
                    <excludes>
                        <exclude>
                            <groupId>org.projectlombok</groupId>
                            <artifactId>lombok</artifactId>
                        </exclude>
                    </excludes>
                </configuration>
            </plugin>
        </plugins>
    </build>

</project>
After Creating, the project folder structure will be like the below.

Step 4: Configure the application properties
Configure Kafka connection details such as the broker address, consumer group, and serializers in the application.properties file.
spring.application.name=kafka-subscribe
spring.kafka.bootstrap-servers=localhost:9092
spring.kafka.consumer.group-id=my-group
spring.kafka.consumer.auto-offset-reset=earliest
spring.kafka.consumer.key-deserializer=org.apache.kafka.common.serialization.StringDeserializer
spring.kafka.consumer.value-deserializer=org.apache.kafka.common.serialization.StringDeserializer
spring.kafka.producer.key-serializer=org.apache.kafka.common.serialization.StringSerializer
spring.kafka.producer.value-serializer=org.apache.kafka.common.serialization.StringSerializer
Step 5: Create Kafka Producer Configuration
Create a configuration class to define the ProducerFactory and KafkaTemplate beans for publishing messages to Kafka topics.
package org.example.kafkasubscribe.config;

import org.apache.kafka.clients.producer.ProducerConfig;
import org.apache.kafka.common.serialization.StringSerializer;
import org.springframework.context.annotation.Bean;
import org.springframework.context.annotation.Configuration;
import org.springframework.kafka.core.DefaultKafkaProducerFactory;
import org.springframework.kafka.core.KafkaTemplate;
import org.springframework.kafka.core.ProducerFactory;

import java.util.HashMap;
import java.util.Map;

@Configuration
public class KafkaProducerConfig {

    @Bean
    public ProducerFactory<String, String> producerFactory() {

        Map<String, Object> configs = new HashMap<>();

        configs.put(
                ProducerConfig.BOOTSTRAP_SERVERS_CONFIG,
                "localhost:9092"
        );

        configs.put(
                ProducerConfig.KEY_SERIALIZER_CLASS_CONFIG,
                StringSerializer.class
        );

        configs.put(
                ProducerConfig.VALUE_SERIALIZER_CLASS_CONFIG,
                StringSerializer.class
        );

        return new DefaultKafkaProducerFactory<>(configs);
    }

    @Bean
    public KafkaTemplate<String, String> kafkaTemplate() {
        return new KafkaTemplate<>(producerFactory());
    }
}
Step 6: Create Kafka Consumer Configuration
Configure the consumer settings and create the required beans to receive messages from Kafka topics.
package org.example.kafkasubscribe.config;

import org.apache.kafka.clients.consumer.ConsumerConfig;
import org.apache.kafka.common.serialization.StringDeserializer;
import org.springframework.context.annotation.Bean;
import org.springframework.context.annotation.Configuration;
import org.springframework.kafka.annotation.EnableKafka;
import org.springframework.kafka.config.ConcurrentKafkaListenerContainerFactory;
import org.springframework.kafka.core.ConsumerFactory;
import org.springframework.kafka.core.DefaultKafkaConsumerFactory;

import java.util.HashMap;
import java.util.Map;

@Configuration
@EnableKafka
public class KafkaConsumerConfig {

    @Bean
    public ConsumerFactory<String, String> consumerFactory() {

        Map<String, Object> configs = new HashMap<>();

        configs.put(
                ConsumerConfig.BOOTSTRAP_SERVERS_CONFIG,
                "localhost:9092"
        );

        configs.put(
                ConsumerConfig.GROUP_ID_CONFIG,
                "my-group"
        );

        configs.put(
                ConsumerConfig.KEY_DESERIALIZER_CLASS_CONFIG,
                StringDeserializer.class
        );

        configs.put(
                ConsumerConfig.VALUE_DESERIALIZER_CLASS_CONFIG,
                StringDeserializer.class
        );

        configs.put(
                ConsumerConfig.AUTO_OFFSET_RESET_CONFIG,
                "earliest"
        );

        return new DefaultKafkaConsumerFactory<>(configs);
    }

    @Bean
    public ConcurrentKafkaListenerContainerFactory<String, String>
    kafkaListenerContainerFactory() {

        ConcurrentKafkaListenerContainerFactory<String, String> factory =
                new ConcurrentKafkaListenerContainerFactory<>();

        factory.setConsumerFactory(consumerFactory());

        return factory;
    }
}
Step 7: Create Producer Service
Create a service class that publishes messages to Kafka topics using KafkaTemplate.
package org.example.kafkasubscribe.service;

import org.springframework.kafka.core.KafkaTemplate;
import org.springframework.stereotype.Service;

@Service
public class KafkaProducerService {

    private final KafkaTemplate<String, String> kafkaTemplate;

    public KafkaProducerService(
            KafkaTemplate<String, String> kafkaTemplate) {

        this.kafkaTemplate = kafkaTemplate;
    }

    public void sendMessage(String topic,
                            String message) {

        kafkaTemplate.send(topic, message);

        System.out.println(
                "Message Sent : " + message);
    }
}
Step 8: Create Consumer Service
Create a consumer service that listens to Kafka topics and processes incoming messages asynchronously.
package org.example.kafkasubscribe.service;

import org.springframework.kafka.annotation.KafkaListener;
import org.springframework.stereotype.Service;

@Service
public class KafkaConsumerService {

    @KafkaListener(
            topics = "my-topic",
            groupId = "my-group")
    public void consumeMessage(
            String message) {

        System.out.println(
                "Message Received : "
                        + message);
    }
}
Step 9: Create REST Controller
Create REST endpoints that allow users to publish messages to Kafka through HTTP requests.
package org.example.kafkasubscribe.controller;

import org.example.kafkasubscribe.service.KafkaProducerService;
import org.springframework.http.ResponseEntity;
import org.springframework.web.bind.annotation.*;

@RestController
@RequestMapping("/kafka")
public class KafkaController {

    private final KafkaProducerService producerService;

    public KafkaController(
            KafkaProducerService producerService) {

        this.producerService = producerService;
    }

    @PostMapping("/publish")
    public ResponseEntity<String> publishMessage(
            @RequestParam String message) {

        producerService.sendMessage(
                "my-topic",
                message);

        return ResponseEntity.ok(
                "Message published successfully");
    }
}
Step 10: Main Class
No additional configuration is required in the main class. Spring Boot automatically configures the Kafka producer and consumer beans.
package org.example.kafkasubscribe;

import org.springframework.boot.SpringApplication;
import org.springframework.boot.autoconfigure.SpringBootApplication;

@SpringBootApplication
public class KafkaSubscribeApplication {

    public static void main(String[] args) {

        SpringApplication.run(
                KafkaSubscribeApplication.class,
                args);
    }
}
Step 11: Run the Application
- Right-click the project.
- Run KafkaSubscribeApplication.
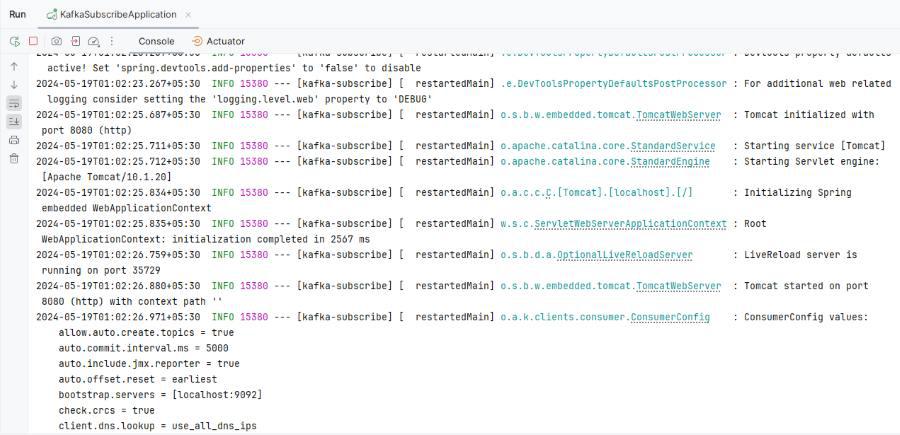
Once complete the application then it will start the application at port 8080.
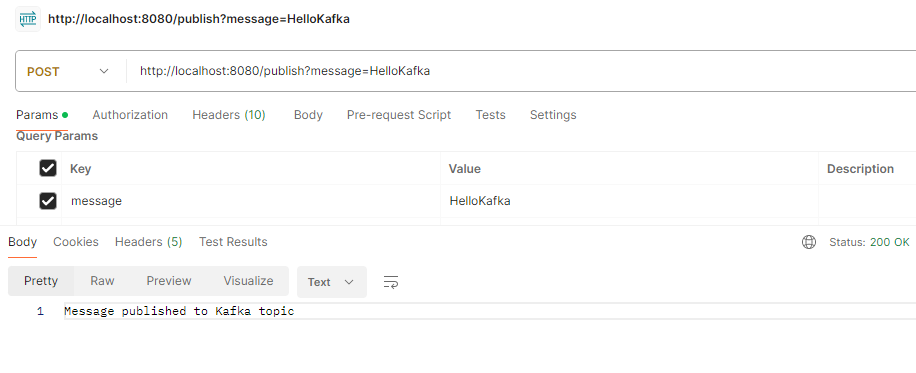
Step 12: Endpoint Testing
Publish the message API:
POST http://localhost:8080/publish?message=HelloKafka
Output:
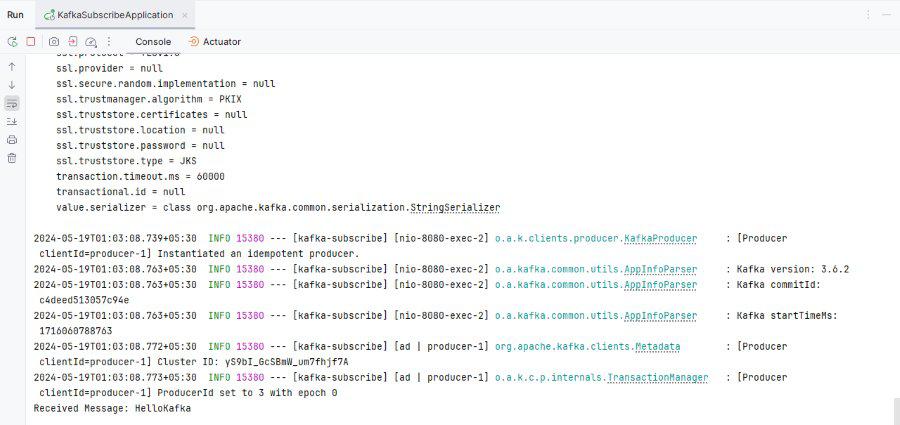
Application Log to print the Kafka Message: