

Automating API testing with Postman allows testers to validate API functionality, run repeatable tests, and ensure consistent results. By using collections, scripts, variables, and automated runners, testers can reduce manual effort and detect API issues more efficiently.
- Supports automated API validation using JavaScript test scripts.
- Enables execution of multiple requests through collections.
- Supports automated execution using Newman and CI/CD pipelines.
Postman Environment Setup
Postman environments help manage reusable configuration values such as API base URLs, usernames, and other environment-specific data. This makes API requests easier to maintain and reuse across development, testing, and production environments.
Create an Environment
Go to the Environments section and create a new environment, such as Development or Testing.
Add Variables
Add reusable variables as key-value pairs.
Example:
base_url = https://api.example.comusername = testuser
Use Variables in Requests
Use variables with double curly braces:
{{base_url}}/users
Instead of hardcoding the complete URL in every request, Postman replaces {{base_url}} with the value from the selected environment.
Select the Environment
Select the required environment before sending or running requests so that the correct variable values are used.
Postman API Testing Automation Workflow
The following example demonstrates how to automate API testing using a collection, API requests, test scripts, and automated execution.
For demonstration purposes, you can use JSONPlaceholder:
https://jsonplaceholder.typicode.com
Step 1: Create a Collection
Open Postman and create a new collection.
- Go to the Collections section.
- Click New Collection.
- Enter a name, such as JSONPlaceholder API Tests.
- Save the collection.
Collections help organize related API requests and allow them to be executed together.
Step 2: Create API Requests
Add the API requests that you want to test to the collection.
Create a GET Request
Create a request named Get Users.
- Select the
GETmethod. - Enter the following URL:
https://jsonplaceholder.typicode.com/users
Save the request in the collection.
.png)
Create a POST Request
Create another request named Create a Post.
- Select the
POSTmethod. - Enter the following URL:
https://jsonplaceholder.typicode.com/posts
Go to Body, select raw, choose JSON, and enter:
{"title": "Post from Postman","body": "This is a test post created using Postman","userId": 1}
Save the reques

Step 3: Configure Authentication for Protected APIs
Many APIs require authentication before protected endpoints can be accessed. Postman can automatically extract authentication tokens from a login response and reuse them in subsequent requests.
A typical authentication flow is:
Login Request
      ↓
Receive Authentication Token
      ↓
Store Token in Environment Variable
      ↓
Use Token in Authenticated Request
Note: JSONPlaceholder does not provide a real authentication workflow. Use an API that supports authentication when implementing this workflow.
Create a Login Request
Create a request named Login.
- Select the POST method.
- Enter the login endpoint provided by the API.
- Go to Body → raw and select JSON.
- Enter the required credentials.
Example:
{
    "username": "{{username}}",
    "password": "{{password}}"
}
Using variables makes the credentials reusable across different environments.
Extract and Store the Authentication Token
Assume that the login API returns the following response:
{
    "token": "abc123xyz"
}
Add the following script in Scripts → Post-response:
pm.test("Login successful", function () {
    pm.response.to.have.status(200);
});

const jsonData = pm.response.json();

pm.test("Response contains token", function () {
    pm.expect(jsonData).to.have.property("token");
});

pm.environment.set("auth_token", jsonData.token);
This script:
- Verifies that the login request returns HTTP status 200.
- Checks whether the response contains a token property.
- Stores the token in the auth_token environment variable.
Note: Some APIs return
access_tokeninstead oftoken, or store the token inside a nested object. Update the script according to the actual response structure.
Use the Token in an Authenticated Request
Open the API request that requires authentication.
- Go to the Authorization tab.
- Select Bearer Token.
- Enter:
{{auth_token}}
Postman automatically replaces {{auth_token}} with the value stored in the selected environment.
When running the collection, place the Login request before authenticated requests so that the token is generated and stored before subsequent requests use it.
Step 4: Write Test Scripts
Postman allows you to write JavaScript test scripts to automatically validate API responses.
Test Script for the Get Users Request
Open the Get Users request and add the following script under Scripts → Post-response:
pm.test("Status code is 200", function () {
    pm.response.to.have.status(200);
});

pm.test("Response is an array", function () {
    const jsonData = pm.response.json();
    pm.expect(jsonData).to.be.an("array");
});

pm.test("Response contains users", function () {
    const jsonData = pm.response.json();
    pm.expect(jsonData.length).to.be.greaterThan(0);
});
This script verifies that:
- The API returns HTTP status 200.
- The response body is an array.
- The response contains at least one user.
Test Script for the Create a Post Request
Open the Create a Post request and add the following script under Scripts → Post-response:
pm.test("Status code is 201", function () {
    pm.response.to.have.status(201);
});

const jsonData = pm.response.json();

pm.test("Response contains title", function () {
    pm.expect(jsonData).to.have.property("title");
});

pm.test("Response contains body", function () {
    pm.expect(jsonData).to.have.property("body");
});

pm.test("Response contains userId", function () {
    pm.expect(jsonData).to.have.property("userId");
});
This script verifies that:
- The API returns HTTP status
201. - The response contains the
titleproperty. - The response contains the
bodyproperty. - The response contains the
userIdproperty.
Important: Use
pm.responseto validate the response of the request currently being executed.pm.requestrepresents the request being sent and should not be used as a replacement for executing a saved collection request.
Step 5: Run the Collection Using the Collection Runner
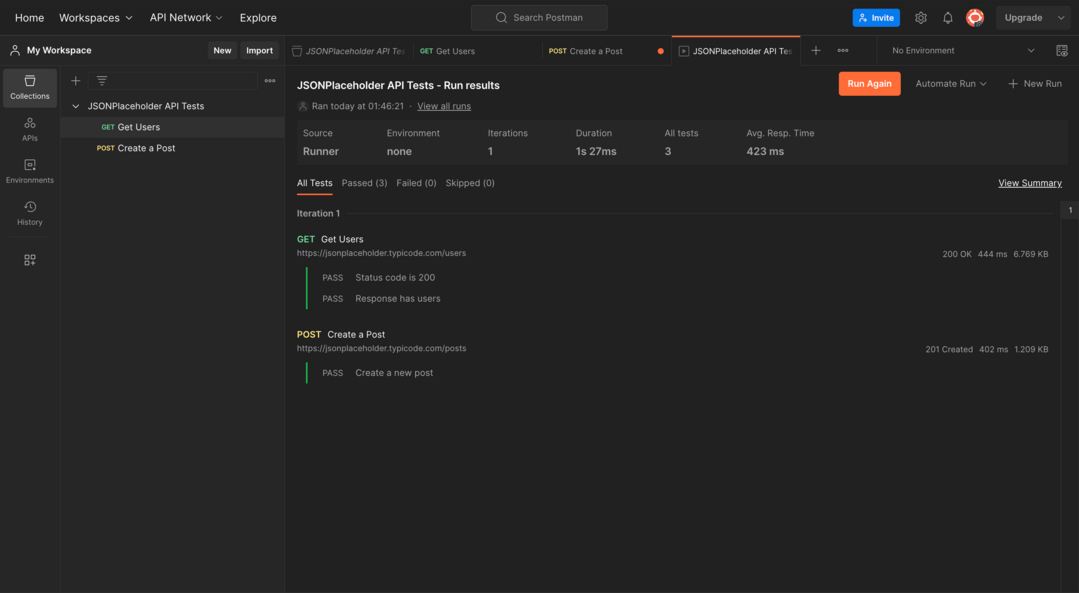
The Postman Collection Runner allows multiple requests in a collection to be executed together. It is useful for running automated API tests repeatedly and reviewing the results.
To run the collection:
- Open the Collections section.
- Select the required collection.
- Click Run.
- Select the required environment, if applicable.
- Configure the run settings, if required.
- Click Run to start the collection.
- Review the execution results.
The results show information such as:
- Requests executed
- Tests passed
- Tests failed
- Request failures and assertion errors
If a test fails, review the failed request or assertion, identify the cause, fix the issue, and run the collection again.
.png)
After the collection finishes:
- Review the test results.
- Identify any failed requests or assertions.
- Investigate and fix failures before running the collection again.
Automate Collection Execution with Newman
Newman is a command-line tool that allows you to run Postman collections outside the Postman application. It is useful for automating API tests, running collections from the command line, and integrating API tests with CI/CD pipelines.
Install Newman CLI
- Open a terminal window.
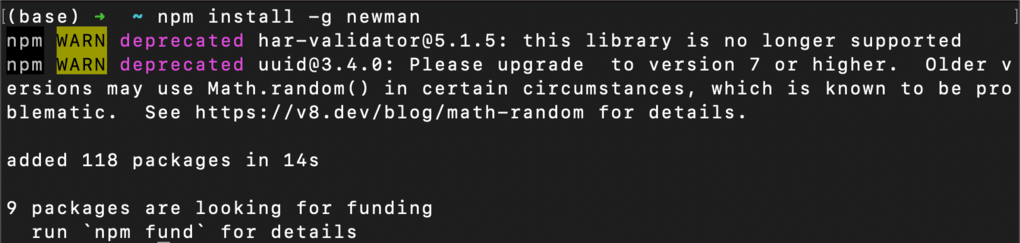
- Run the following command: npm install -g newman
Note: This will install Newman, which is the command-line Collection Runner for Postman used to execute and automate API tests.
Once Newman is installed, run it from any directory on your machine. To run tests automatically using Newman, use the following command:
Running Tests Manually: newman run <collection-name>
Here, the collection file is named JSONPlaceholder API Tests.postman_collection.json, so the following command is used:
newman run "JSONPlaceholder API Tests.postman_collection.json"
.png)
Schedule Automated API Tests
Newman does not provide built-in scheduling. However, you can schedule Newman commands using external tools.
- Use Cron to schedule tests on Linux and macOS.
- Use Windows Task Scheduler to schedule tests on Windows.
- Use CI/CD tools such as Jenkins, GitHub Actions, or GitLab CI to run tests automatically during development and deployment workflows.
These tools can execute Newman commands automatically at scheduled intervals or when specific events occur, such as code changes.
Best Practices for Automating API Tests in Postman
The following are best practices for Postman API test automation:
- Organize related tests into collections and folders to make them easier to manage and execute.
- Use variables and environments instead of hardcoding values to make tests reusable and portable.
- Write clear and reusable test scripts to simplify maintenance.
- Validate important response details, such as status codes, response bodies, headers, and required properties.
- Implement appropriate error handling for unexpected responses.
- Log and review test results to identify failures and issues.
- Implement data cleanup strategies to remove or reset test data after execution and maintain a consistent testing environment.
Benefits of Automated API Testing
Some of the benefits of automated API testing are:
- Automated tests execute faster than manual tests, enabling quick validation of multiple APIs.
- Automated tests reduce human errors by using predefined test scripts and assertions.
- Tests can be executed repeatedly with consistent results, making automation useful for regression testing.
- Multiple APIs and workflows can be tested efficiently across different environments.
Limitations of Postman
Postman is a powerful API testing tool, but it also has certain limitations that should be considered while using it for automation and large-scale testing.
- Postman is not ideal for large-scale performance testing compared to dedicated tools such as JMeter or k6.
- Complex test logic can become difficult to manage as collections grow.
- Advanced automation workflows may require additional configuration and external tools.
- Large test suites may require additional tooling and configuration for efficient execution and reporting.
